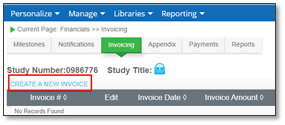
Permissioned users can create new invoices using the Invoicing page.
To create an invoice:
1. From the Invoicing tab, select Create a New Invoice.
The Invoice Creation page displays:
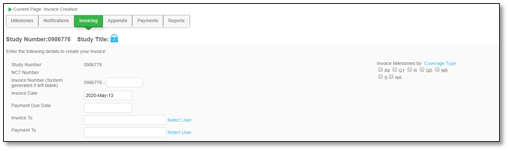
Fields available on this screen are defined below.
Field
Description
Invoice Number
Enter an invoice number. Will be system generated if left blank.
Invoice Date
Enter the date for the invoice.
Payment Due Date
Use the calendar picker to specify the date the payment is due.
Invoice To
Click the Select User link to associate a user for the invoice.
Payment To
Click the Select user to associate a user for the payment.
Notes
Enter notes as necessary, if notes should appear with the invoice.
Display
Select the appropriate option for which the receivables should display.
For Dates
Select a timeframe for which receivables should display.
Invoice Milestones by Coverage Type
Select a type for which receivables should display.
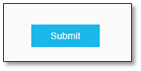
2. After filling out information in the available fields to meet your specific invoicing needs, ensure you have selected the option “All Receivables” in the Display field, and click the Submit button.
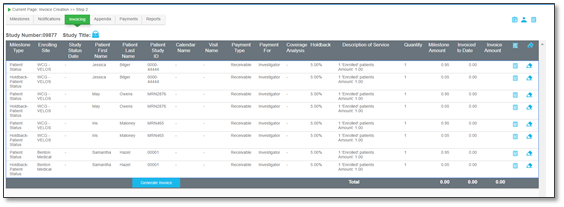
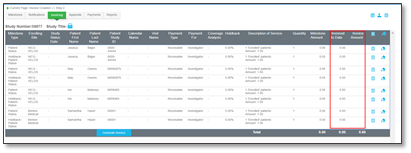
The Invoicing page will refresh to display the newly created invoice:
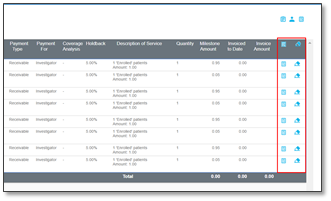
There are two functionalities used to calculate the amount to be invoiced, Calculate and Erase:
View the table below to learn more about how the calculate and erase buttons work:
Button
Description
Calculate
Click the Calculate icon to insert the amount for all the milestones displayed. This icon adds the amount listed under the Milestone Amount column for the milestone. The invoice amount cannot be greater than the milestone amount.
Erase
Use the erase icon to clear the invoice amount.
3. Enter the amount to be invoiced by using the Calculate button to invoice the full invoiceable amount, or click directly in the Invoice Amount field to enter a custom amount to be invoiced. Note that as you enter values in the Invoice amount column, a total is calculated at the bottom. This will be the total invoice amount.
Note: Only achieved milestones with an Invoice amount will be listed on the invoice.
Warning: The Invoice Amount cannot be greater than the Milestone amount but can be less.
Note: Each invoiceable may be invoiced partially. The system will keep track of invoices that have been paid via the reconciliation process, and update the “Invoiced to Date” amount column accordingly. This ensures you cannot ever exceed the Milestone amount as defined by the milestone.
4. Click the Generate Invoice button once all desired invoice amounts have been assigned.
5. The Print Invoice window will display. Users may export the invoice, print using the appropriate buttons, or close the window.
Note: Any items added to a generated invoice will not be considered “Invoiced” until they have been reconciled via payments. See Manage Payments to learn more.
Note: There are three views available once the invoice generates: Velos Invoice (using your logo), Invoice by milestone type, and Invoice by patient. Select the invoice template that best suits your needs and export it for invoicing.