Edit fields are open fields that allow end-users to enter data into the form. Depending on the sub-type of edit field, it may be text, numerical, or date data. See Add and Manage Fields for more information on subtypes. If a required edit field does not already exist in the Field Library, permissioned users can add new edit fields using the Libraries menu.
To add a new edit field:
1. Click the Libraries menu in the upper-left hand corner of the screen, and select the Add Edit Box under the heading “Fields”.
-OR-
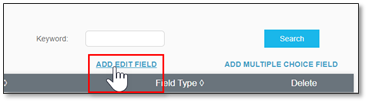
From the Field Library page, click the Add Edit Field link on the right side of the screen.
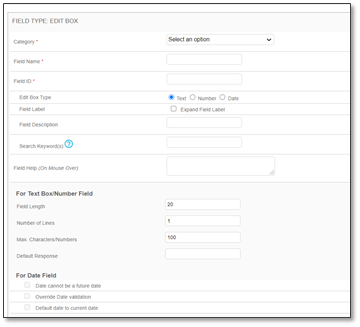
The Edit Box editor displays in a new window:
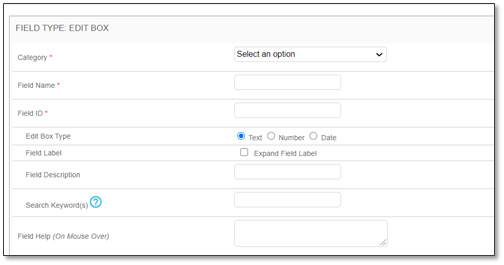
2. Select the field category, name, a unique ID, and Edit Box Type. See Add and Manage Fields for more information about edit box types.
Note: Field ID values cannot contain any spaces and must be unique.
3. Continue down the page. Determine if the field label should expand automatically based on its contents by selecting or skipping the Expand Field Label checkbox.
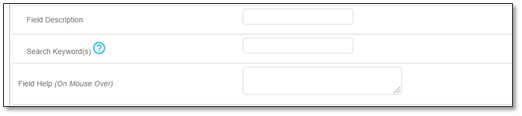
4. Continue down the page. Enter a field description, search keywords, and field help message. The field help message displays a notification when the user hovers their mouse over the field.
Note: Search keywords aid user searches by associating these keywords with the field to improve search results in the Field Library. Separate keywords by a comma.
5. Continue down the page. If required, enter field length, number of lines, max characters allowed and a default response in the available fields. The default response auto-populates a value in the field.
Note: Field length determines how wide the field is relative to characters that can fit in the field. Number of lines determines how many lines the field occupies and Max Characters/Numbers determines the maximum number of characters that can be entered into the field.
6. If the edit field is a date sub-type, make the appropriate selections in the For Date Field section.
Note: The available options in For Date Field allow you to constrain the data to past dates (Date cannot be a future date), allow custom date formats (Override Date Validation), and to default the field value to the current date (Default date to current date).
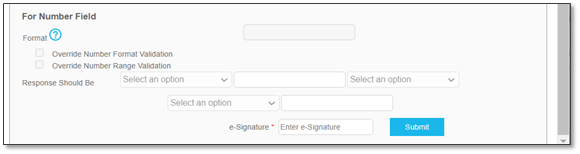
7. If the edit field is a number sub-type, make the appropriate selections in the For Number Field section. This section allows you to constrain the format, override validation and number ranges (this is best configured when adding a field to a form), and to set number range parameters.
Note: The For Number Field section allows you to determine format by using “#” to represent a number and “.” to represent a decimal. This will constrain the format of the number entered by users.
Enter your e-Signature and click the Submit button.